

How To Upload a Youtube Video / Shorts In 2025? YouTube isn’t just the world’s biggest video-sharing platform—it also ranks as the second most-visited website globally. Whether your goal is to promote a small business, grow an online blog, or bring more visitors to your free website, YouTube marketing can be a game-changer.
If stepping into this space feels overwhelming, don’t worry. Setting up a YouTube channel, picking the right name, and uploading videos is much easier than it seems. In this guide, we’ll walk you through the simple steps to upload your first video to YouTube.
Before Uploading Your Video
Before you start uploading, it’s important to confirm that YouTube supports your video file type. Since YouTube is built for videos, it works with almost all major formats. Here’s the list of supported ones:
- MOV
- MPEG4
- MP4
- AVI
- WMV
- MPEGPS
- FLV
- 3GPP
- WebM
- DNxHR
- ProRes
- CineForm
- HEVC (h265)
If your file format isn’t on this list, you’ll need to export your video again in a supported format. You can also use YouTube’s built-in troubleshooter for help with file conversion.
How to Upload a Video to YouTube
Step 1
Sign in to your YouTube account with your Google email and password.If you don’t already have one, you’ll need to create a Google account first, since YouTube is linked directly to Google services.
Step 2
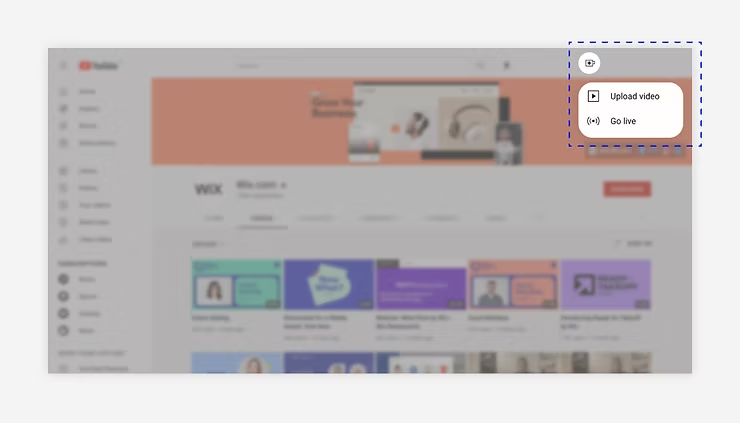
On the top-right corner of your YouTube page, click the camera (video) icon. You’ll find it right next to your profile picture, notifications, apps, and messages.
Step 3
From the dropdown menu, select “Upload Video.”
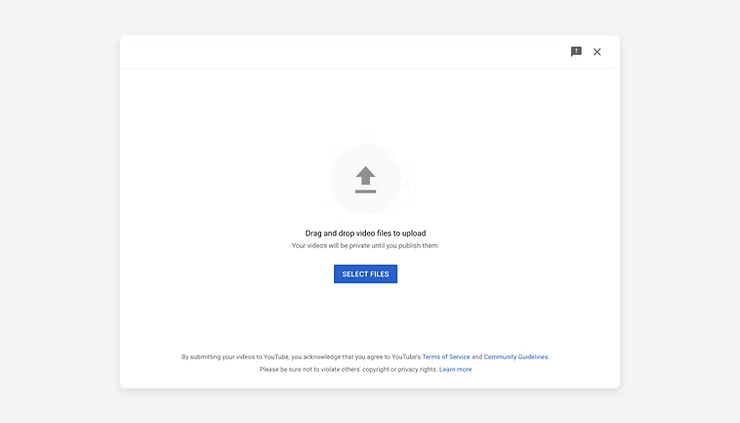
Step 4
Click on “Select Files” to choose the video stored on your computer. Alternatively, you can simply drag and drop the file into the upload window for convenience.
Step 5
Once your video has finished uploading, you can either publish it right away or schedule it to go live at a date and time that best matches your audience’s viewing habits..
Add Final Details In Your Video
To help your video perform at its best, make sure you fill out the important details like privacy settings, thumbnails, and SEO information.
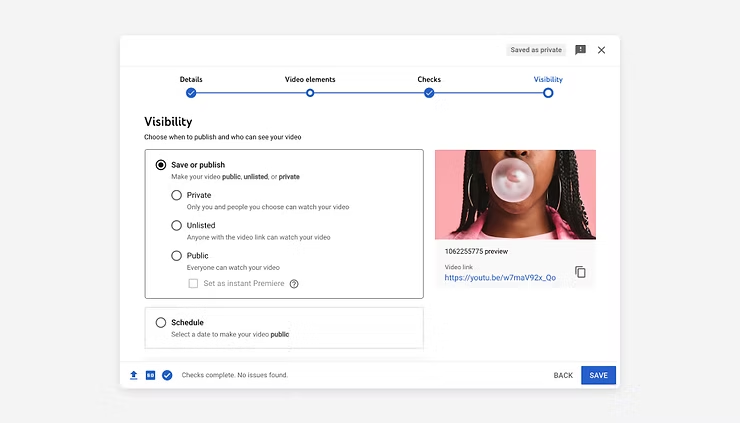
Choose Your Privacy Settings
YouTube lets you decide who can watch your video. You’ll have three options:
- Public: Visible to everyone and searchable on YouTube. This is the best option if you’re growing your channel, marketing your business, or reaching a wider audience.
- Unlisted: The video won’t appear in search results or your channel feed, but anyone with the direct link can watch. This is useful for sharing exclusive content, events, or promotions.
- Private: The video will only be visible to you and the specific people you choose to invite. It won’t appear in search results or on your channel.
After selecting the option that works best for you, click “Save.”
Make Your Video SEO-Friendly
Optimizing your video for SEO ensures it has a better chance of appearing in both YouTube and Google search results. By making your content clear and searchable, you can reach more of your target audience.
Start by doing keyword research with tools like Google Keyword Planner or Wordstream. These tools will help you discover the exact words and phrases your audience is typing into search bars.The more accurate and relevant your keywords are, the greater the chances that viewers will discover your video—and be encouraged to click on it.
Once you’ve picked the right keywords, be sure to add them naturally into:
- Your video title
- The description
- The file name before uploading
This small step can make a big difference in boosting your video’s visibility and watch time.

Additional Details to Enhance Your Video
Audio:
YouTube provides a huge free audio library filled with music tracks and sound effects. After uploading, you can swap or add background audio to make your video more engaging.
Blur Faces:
Protect privacy by using the Enhancements tab to blur faces in your video. For more control, the Custom Blur option lets you decide exactly what to hide.
End Screens:
Place an end screen during the last 5–20 seconds of your video to guide viewers toward other content, playlists, or a subscribe option.. Use it to highlight other videos, playlists, subscription buttons, or external links. To save time, you can also apply ready-made templates.
Cards:
Interactive cards let you direct viewers to specific links (from eligible sites), other videos, or playlists. You can customize them with images, titles, and calls-to-action.Closed Captions:
Make your content more accessible by adding captions. Choose your language, upload a caption file, or let YouTube auto-sync your transcript for accurate subtitles.
Thumbnail:
Your thumbnail is the first thing people notice. Pick a high-quality, eye-catching image that truly represents your video and encourages viewers to click.

After You Upload Your Video
Once your video is live on YouTube, it’s discoverable by anyone. But if you want to grow faster as a creator, don’t just rely on YouTube’s algorithm—promote your content yourself. Share the video link with friends, family, and across your social media platforms to increase visibility and drive more views.
You can also use a link-in-bio tool (such as Hopp by Wix) to create a single URL that directs viewers to your YouTube videos, website, and other social media profiles. As your channel grows in popularity, this visibility may even open the door to earning money on YouTube.
Keep Your Channel and Website Updated
To maintain a professional look and ensure your audience always sees fresh content, try these strategies:
- Add videos to your website: Use tools like Wix Video (powered by Vimeo) to embed your YouTube videos or playlists directly onto your site.
- Create quick promotional clips: With Wix’s video maker, you can design short videos to feature on your site and then upload them straight to YouTube via Wix Video.
- Sync your channel: Connect your YouTube channel to your website so that new uploads automatically appear on your site without extra effort.
YouTube Upload Guide – FAQ Section
What’s the reason YouTube restricts videos to 15 minutes?
If you’ve just started your YouTube channel, uploads may be limited to 15 minutes or less. This restriction is in place to reduce spam and misuse of the platform.
To unlock longer uploads, you’ll need to verify your YouTube account. Once verified, you’ll be able to post videos longer than 15 minutes without any issue.